Simplify Your Rowing Stroke
When you’re just starting to learn how to row, it can be overwhelming watching technique videos, especially if it’s a follow along drill or follow along workout where the coach is giving a lot of cues. Examples of cues are chest up, shoulders down, arms out then body over, and they may be telling you to do a lot of the things at once. And you’re like “Whoa! I’m confused. That was a lot.” And now you’re thinking about all these things, and you don’t know how you’re supposed to move and…. I think you’re catching on. It can be overwhelming for anyone!
If you’re trying to work on your rowing stroke, there’s a way that I like to simplify it so you can systematically work through your stroke. I’m going to teach you how to break it down in this post. If you don’t know where to start and don’t know what to focus on, then stick around. I’m Alicia Clark, and I’m an ambassador with UCanRow2.
Time & Position
When trying to simplify your rowing stroke, start with an individual body part. Feet, knees, hips, body, and chest are a couple examples of body parts. With each body part, you want to think about position and time.
First is position, meaning “am I moving this body part into the correct positions?” That’s the first thing to check. Next is time. Ask yourself, “am I doing that at the right time?” I’m going to go through a couple examples here in a moment. Figuring out the correct way to move might take a little bit of research on your part.
When watching a rowing video where they talk about form, you might hear someone say, “shoulders down.” So, you have a body part (your shoulders), and you want them down. Next, ask yourself “when do I want them down?” They may be talking and going through the stroke and say something like “throughout your stroke, keep your shoulders down and relaxed.” Well, there, you have it! You want your shoulders to always be down and relaxed. That “always” is the time.
Check Your Stroke
Now that you have a body part, time, and position, it’s time to go to your own stroke. I suggest videoing yourself, instead of assuming that you’re doing it. It’s easy to think “oh yeah, I’m doing that” and then look at your video and you don’t look like that at all! It’s worth it to video yourself when looking for these things.
For example, some common errors with “shoulders are always down and relaxed” could be shrugging or overreaching once you rock forward into the catch. Anything outside of what’s supposed to be happening is what you’re looking for.
Drive vs. Recovery
Depending on the body part, you may have to break it up with what’s happening on the drive versus the recovery. A good example is the body swing. On the drive, you want that body swing to be after the legs are down and on the recovery it’s before the knees bend. The position of that body swing is 11 o’clock to 1 o’clock.
First, check that you have the correct body swing, being from 11 o’clock to 1 o’clock. Once you have that, it’s time to look at your timing. Check that the legs are down before body opens on the drive, and that the body rocks forward before the knees bend on the recovery. You’re going to be looking for things outside of that, that don’t match up. So, if your knees bend early on the recovery, then you need to work on swinging at the right time. You’ve found something you can work on! Or you could be leaning back at the catch. This is incorrect timing, so now you know you would want to work on leaning back later in the drive.
Anything outside of that body part’s correct time and position is what you’re looking for. This is the process I use with the whole body! Start with a body part, figure out what it is supposed to be doing and at what time, and compare that to what you see happening. Instead of trying fix five things at once, it helps to focus on one at a time. It’s tempting to try to fix multiple things at one time, but what’s going to make a difference and help you get leaps and bounds better is taking it one step at a time. If you can get good at staying focused about one thing, you’re way more likely to get better.
In summary
My suggestion is that when you’re trying to get better at your rowing stroke, start by picking a body part. When you’re reviewing your own stroke for that specific body part, figure out the correct time and position that it’s supposed to be in, compare it to your own and see if that’s what you see. This is how I like to break it down and help people get better.
I hope that this was helpful for you, and I hope that you’re able to take this and work on your own stroke. Especially helping you get the courage to video yourself and watch it back. You’re going to start to get so much better, so much faster! I think you’ll be really surprised.
Again, this does require a bit of research to know that you’ve found the right information. If you want to skip that research, I totally get it because it can feel a lot. To help you skip all that research, check out the link HERE for more on how you can skip all of that.

Everything to Know About the Catch Position
There’s a lot that goes into having a good catch position on the rowing machine. A good catch allows you to start your stroke off right and sets you up for success each and every stroke you take. Here is a picture of a good catch position: Here are the big things...
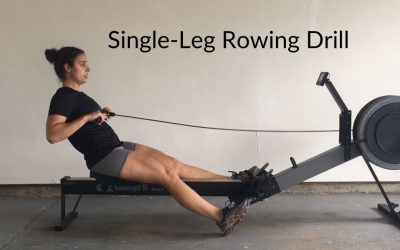
Single-Leg Rowing Drill
This drill for indoor rowing is just as the name implies. You take one foot out of the foot stretchers and only row with one leg. The leg that isn’t rowing hangs out on the side while you row. I don’t recommend trying this one in a boat at all. There’s really no...

Wait, There’s Cake?
I’m pretty sure I’ve said this at some point in my rowing career. Unfortunately, the response from my coach was “nope! Just cut the cake drill”. I’m not sure anyone knows why this drill is named that. I mean, it always makes me hungry! Joking aside, the cut the cake...