Do’s and Don’ts of the Rowing Finish Position
Today, I’m going to be talking about the finish position. That’s going to be the back part of your stroke, where you finish your drive. I’m going to talk about what you want to be doing, and what you want to be on the lookout for when critiquing your own rowing technique.
What You Want
First, I’m going to go over what you want to be looking for at the finish position. It’s important to have a nice and strong finish position to take advantage of your arm pull. While your arms only do 10% of the work in your rowing stroke, you still want to optimize that 10% as much as you can. Having a good finish position also helps keep your shoulders, elbows, and wrists nice and safe.
At the finish, you want to be leaning back slightly. If you’ve heard and seen that your body swing should be from 11 o’clock to 1 o’clock, that’s where you want to be. When you finish your stroke and swing your body back, the 11 o’clock or 1 o’clock position is where you would be in there was a clock face overlayed onto a side view of your rowing. Depending on orientation of your video of yourself, it’ll be either 11 or one.
Then, you want to have those shoulders down. You want to have strong shoulders, with your elbows going mostly back, with flat wrists, while finishing with the handle to the bottom of your sternum.
The goal is to be leaning back slightly, but still sitting up nice and tall. It’s the strongest position for your body to be in.
Technique Errors
When reviewing your own technique, now that you should what you SHOULD be doing, here’s what you may see in your stroke that deviates from that.
First thing that I would look at are your shoulders. Are you shrugging up at any point? Are you trying to force it too much into the finish with your shoulders? You want to think about driving those elbows back. You don’t want to be sitting up so tall that it looks uncomfortable, just enough so that you’re leaning back slightly but still up tall.
Your shoulder blades are going to come together as those elbows drive back, but you want to feel tall, not uncomfortable. Watching out for shrugging in the shoulders will also keep your neck safe from overusing those muscles when you don’t need to be. If at any point you see your neck disappear when you’re rowing, it’s good to pay attention to that area.
You want to be looking at where your handle is because that can have an effect on the wrists and the elbows at the same time. If your handle is too high, your wrists must bend to get it there. That’s going to be more common than finishing too low. You want to find a height where your wrist can be straight, and your elbows are comfortably back.
You don’t want your elbows out to the side too much, because it will cause your wrists to bend awkwardly. A good measure is to say your elbows will be around a 45 degree angle from your body.
Why This Way?
Why is this position that one you want? Straight wrists will be stronger. If you think about doing a bent over row, when you have the weight in your hand, you’re pulling it to your side, but your wrist stays straight. Your bent over row is not going to be as powerful if you’re trying to pull with the bent wrist. So, when you finish with the straight wrists, sitting up tall, that’s going to be a lot stronger. To have straight wrists, the elbows and handle need to be at the correct spot to make it happen.
Circling back to the 11 to 1 o’clock body swing, it’s important to make sure that you’re not leaning too far back. You’re going to tax your core much more than you need to if you’re leaning too far back. You don’t need much more again than that 11 to 1 o’clock swing to get power from opening the hips.
Recap
To recap, you want to be sitting up tall at that 11 or 1 o’clock position. Shoulders are down, but they’re strong. Elbows are back at about 45 degrees. Wrists are flat with a good handle height. As you start to row with that finish position, you want to hit that finish position every time.
If you’re looking at your own video, you can pause at the finish a couple times as part of a drill, but I don’t recommend pausing at the finish. If you’re just going through normal strokes, you want to come out of it like a quick U-turn. As you’re watching your own video, you can slow it down, go frame by frame and look at what you’re doing at your finish position, focusing on your wrists.
Start there. Look at your hands and look at your shoulders. Those are going to be the two big places to check when you’re looking at your finish position.
The finish position is only ONE part of the stroke that I go through in my course, Revamp Your Rowing. If you’re interested in learning more and learning how you can check your own form so that you can be more confident in your rowing, check out this page HERE.
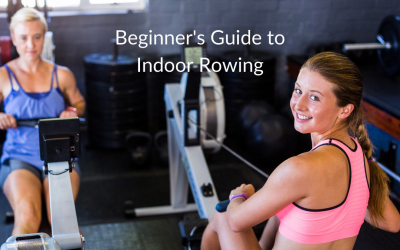
Beginner’s Guide to Indoor Rowing
Getting a new workout machine is much like getting a new toy on Christmas. There’s so much excitement and anticipation to try it out! Many times we play with that new toy for a couple of days, and then it’s out of sight and out of mind. My guess is that’s not how you...
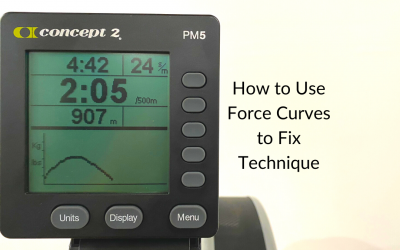
How to Use Force Curves to Fix Technique
You may know what a force curve is, and you might not. There’s no rule anywhere saying you need to know what your force curve looks like, or use it. However, it can be a useful tool to see how you’re applying power. Confused? No worries. We will get into what a force...

Everything to Know About the Catch Position
There’s a lot that goes into having a good catch position on the rowing machine. A good catch allows you to start your stroke off right and sets you up for success each and every stroke you take. Here is a picture of a good catch position: Here are the big things...