The Pick Drill
New to rowing? Need a technique overhaul? I highly suggest starting with the pick drill.
The pick drill is useful in a lot of different ways. For beginners, it’s a great way to learn the stroke. You’re not worried about power, just correct movement. For more advanced rowers, it can be used as a good warmup to get moving. Starting a workout with good technique that carries into the workout is important! (and will improve your splits too!)
This is a good drill for anyone who bends their knees early on the recovery or brings their hands over their knees when they row, as it emphasizes the correct body positions.
Here’s how it is broken down:
ARMS ONLY – Start at the finish. Sitting up tall, bringing our shoulders back and down, at the 11 o’clock position. While the upper body does not move, the hands come away from the body. Once the arms are straight, you pull into your sternum into the finish.
ARMS AND BODY – After rowing arms only, you add in the body swing. When the arms are fully extended, your body rotates forward so that the handle is now over your shins. You want the handle to stay at the same height throughout. Once your body has rotated over, swing the body back on the drive, and then pull the arms in to end at the finish.
ARMS, BODY, HALF SLIDE – Now you are adding in part of the legs. Once you are in the body over position, bend the knees to get to half slide. Your heels should be down on the footboards. If your heels are picking up, then you are closer to full slide and should do less. When you get to half slide, drive into your heels while bracing your upper body to straighten your legs. Once the legs are straight, then you swing your body open, and pull in with the arms.
FULL STROKES – The only difference here is that you are bending your knees more to get to full compression. Full compression is when your shins are vertical to the ground. From the finish, it goes arms, body, then legs. From the catch, it’s legs, body, arms.
An important thing to remember here is to hit that body over position, with arms extended, before bending the knees. This is one of the most common errors I see.
I’ve seen different variations of this drill. You can add in more sections in the middle by doing a quarter slide, then half slide, then three-quarter slide before moving onto the full stroke. Find what works best for you or your clients and do that.
If you’re a visual learner, I also have a video to show you how to do this drill. Check it out:
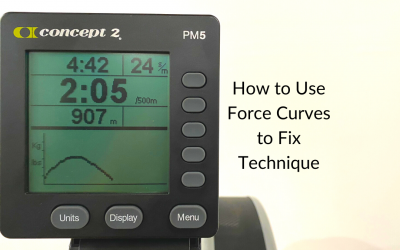
How to Use Force Curves to Fix Technique
You may know what a force curve is, and you might not. There’s no rule anywhere saying you need to know what your force curve looks like, or use it. However, it can be a useful tool to see how you’re applying power. Confused? No worries. We will get into what a force...

5 Signs You Need a Rest Day
Most of us are go, go, go. All the time. While it’s great to be motivated, it’s also dangerous to go until you drop. Being able to catch yourself before you get to that point is so important. It will save you so much mental headache in the long run. In terms of your...

What a Coach Can Do for You
In a world that is bent on doing it all ourselves, it’s rare that we seek out help. So much headache can be spared when we set aside pride. Not only that, but it can be a huge time saver as well. Having a coach to guide you through your health and fitness journey...