The Reverse Pick Drill
“Isn’t it just the pick drill in reverse?” Not quite, but I can see why that can be confusing!
The reverse pick drill is a useful tool to have in your rowing toolbox. It emphasizes correct body positioning, which is super important to have a strong and technically sound stroke.
The cool thing is though, the reverse pick drill can help with different technical errors than the pick drill does. The pick drill starts from the finish, while the reverse pick drill starts from the catch. This shifts our mindset to think about the power we are applying as well.
The reverse pick drill is useful if you or your client opens their body too soon on the drive, brings the handle over up and over their knees, or needs help with applying consistent power (to name a few).
Here is the breakdown:
Legs only – Starting at the catch, push through your heels until your legs are straight. Your shoulders should still be rotated forward in front of your hips at the 1 o’clock position. From a side view, only your legs should be moving. When driving your heels down, brace with your lats by focusing on holding your shoulders back and down.
Legs and body – Now add in the body swing. On the drive, after your legs are down, swing your body from the 1 o’clock position to the 11 o’clock position. Arms stay straight the whole time, as if they are straps. In the recovery, swing your body from the 11 o’clock position to the 1 o’clock position before bending your knees to come up to that catch. When you pivot forward, the handle should be in front on your knees, allowing the handle/chain height to remain at the same height throughout.
Full stroke – Now add in the arms. On the drive, your legs drive into the footboards, your body swings open, and then you pull in with the arms. From the finish, you extend your arms out while remaining in the 11 o’clock position. Once your arms are straight, move your body forward from the 11 o’clock position to the 1 o’clock position. When you hit this body over position, then you can bend your legs to come up to the catch.
The focus of this drill is hitting the correct body positions. It also helps with starting to apply some power behind those body positions. When doing this drill, play around with the force curve screen. The goal is to have a smooth curve. If you don’t, it is because you are losing power somewhere in your stroke.
In order to improve your split, the power you exert with your legs has to make it through your hips, shoulders, arms, hands, handle, and into the machine. The more power you can transfer, the more efficient you are as a rower. This is a good drill to work on that!
For any visual learners, I also made a video explaining this drill.

The Pick Drill
New to rowing? Need a technique overhaul? I highly suggest starting with the pick drill. The pick drill is useful in a lot of different ways. For beginners, it’s a great way to learn the stroke. You’re not worried about power, just correct movement. For more advanced...
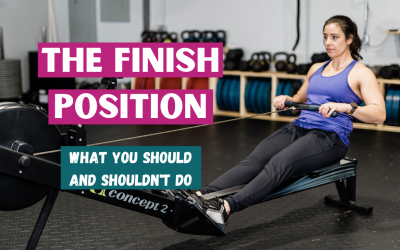
Do’s and Don’ts of the Rowing Finish Position
Today, I'm going to be talking about the finish position. That's going to be the back part of your stroke, where you finish your drive. I'm going to talk about what you want to be doing, and what you want to be on the lookout for when critiquing your own rowing...
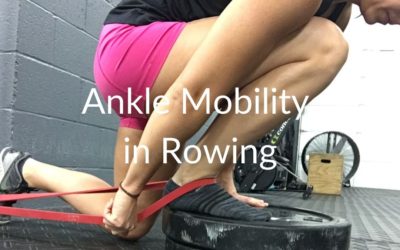
Ankle Mobility in Rowing
Most people may think you don’t need much mobility in order to row. They may be correct, but you do need plenty of mobility to row WELL. One area that I want to focus on is ankle mobility. I want to explain why this is important, and some exercises you can do before...